Access the Rynus Network’s powerful GPU resources to accelerate your 3D Rendering projects with ease through just a few simple steps:
- Create Rynus Account
- Connect Crypto Wallet (Optional)
- Deposit Account
- Install Rynus Transfer App and Upload Project Data
- Create Rendering Job
- Monitor Rendering Progress and Review Results
- Download Results
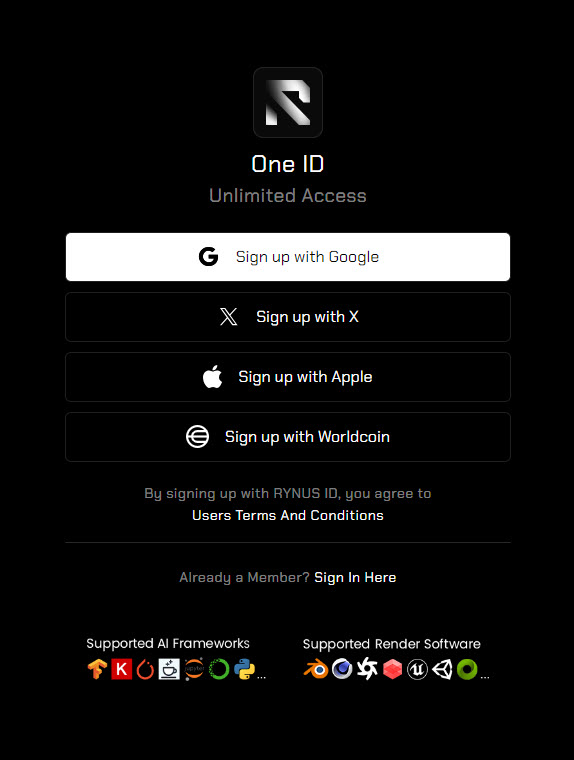
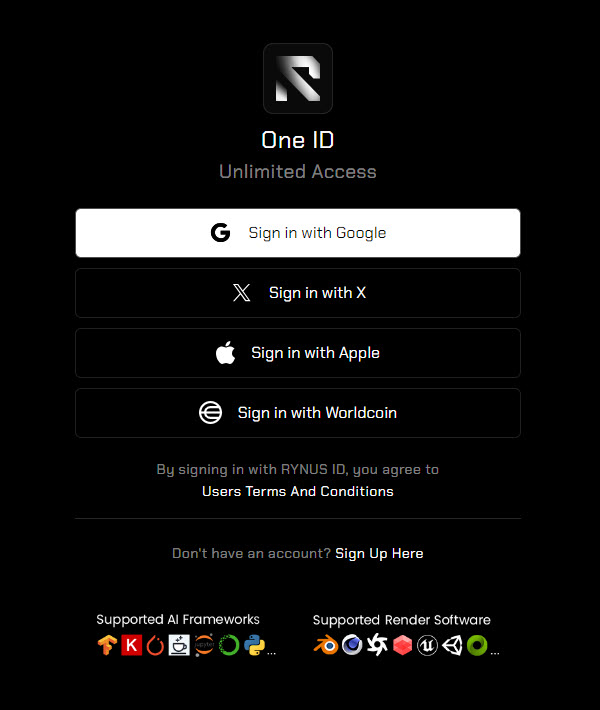
Create Rynus Account
Visit cloud.rynus.io and select from several supported services such as Google, X (formerly Twitter), Apple, and Worldcoin.
- Select your preferred option to create a Rynus account.
- Then, log into your Rynus account.
Connect Crypto Wallet
Currently, Rynus offers two payment options: Crypto and Fiat Money.
- To pay for the network services with Crypto, you must connect a Crypto Wallet to your Rynus account.
- If you want to pay with Fiat Money, you can skip this “Connect Crypto Wallet” step.
- Choose the Connect Wallet button at the upper right
- Select a supported wallet
- Connect your wallet to your Rynus account
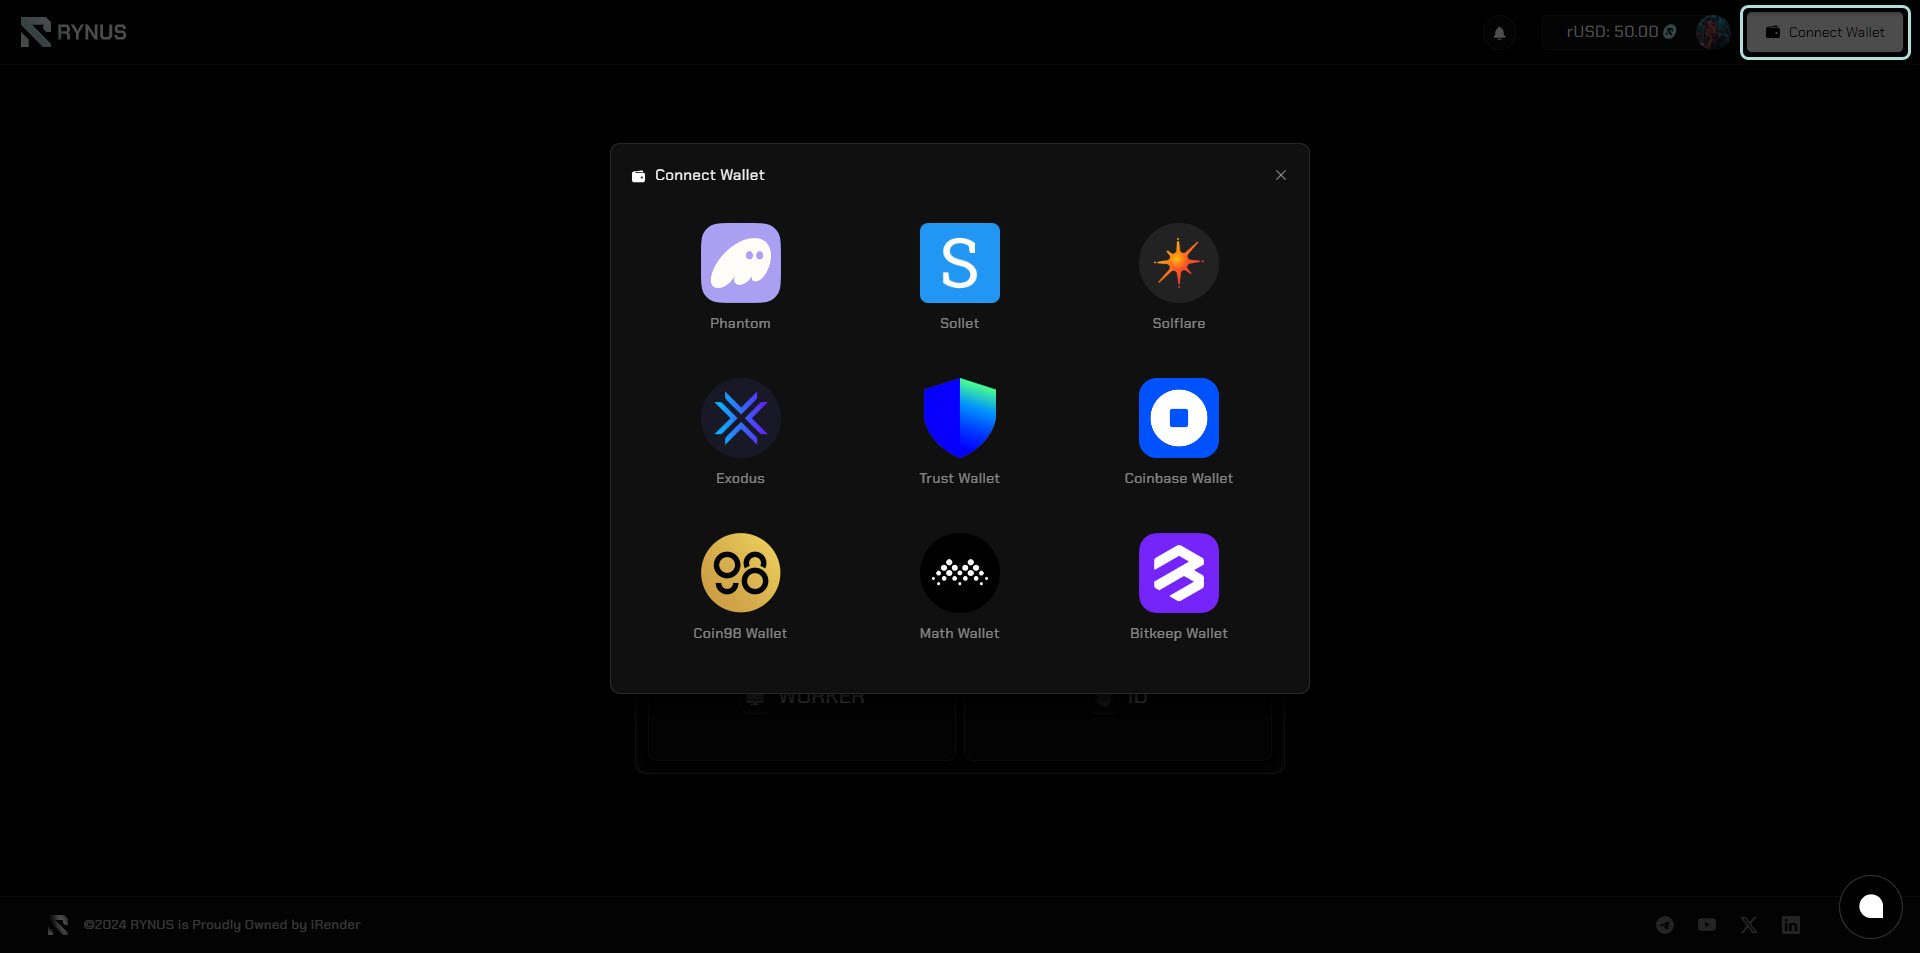
After the wallet is connected successfully, a green checkmark will display right next to your profile icon.
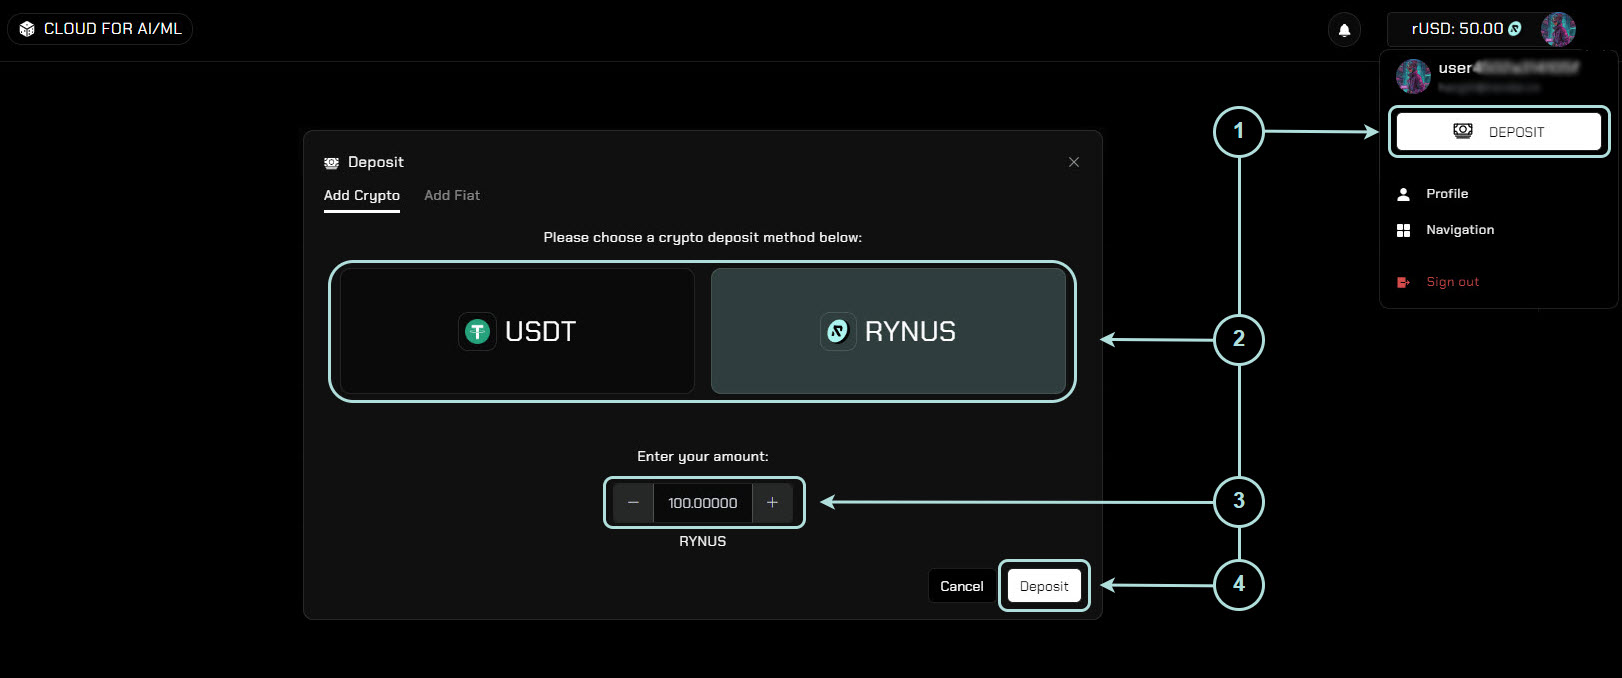
Deposit Account
The Rynus payment system is deposit-based, meaning you need to deposit funds into your accounts before submitting computing jobs. Rynus supports two payment methods – Crypto and Fiat Money.
Deposit in Crypto
- Click on your profile icon in the upper right corner and choose Deposit
- In the Add Crypto page, choose either the USDT or RYNUS method
- Enter the deposit amount
- Click Deposit
Deposit in Fiat Money
- Click on your profile icon in the upper right corner and choose Deposit
- In the Add Fiat page, choose either the Onepay, PayPal, Banking, or Stripe method
- Enter the deposit amount
- Click Deposit

Install Rynus Transfer App and Upload Project Data
To submit a computing job to the Rynus network, you need to upload your job data. Currently, Rynus offers a desktop application that makes the data (especially Big Data) upload process easier and faster.
Install Rynus Transfer App
- Navigate to the CLOUD FOR RENDER portal
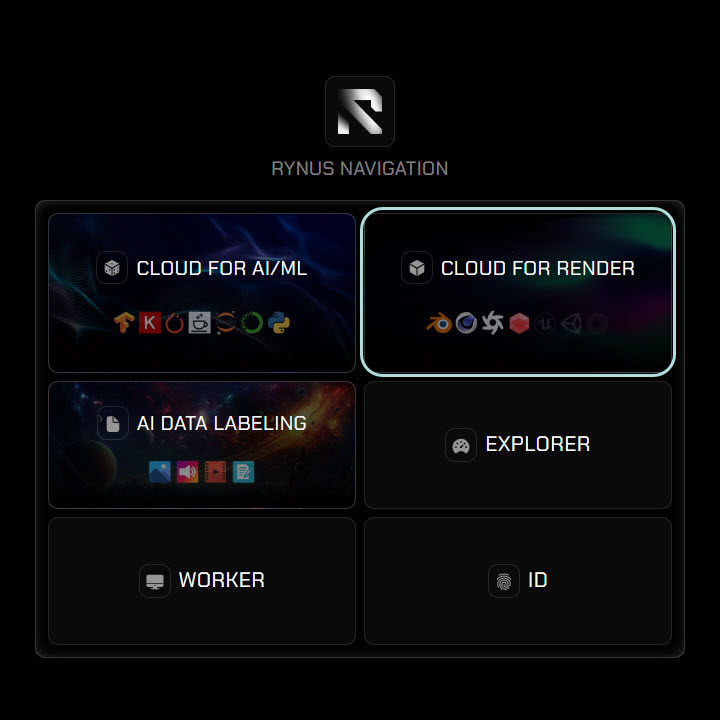
- Choose the New rendering job button
- Select RYNUS Transfer and download the setup file for your device’s OS
- Open the downloaded RYNUS Transfer Setup file and follow the instructions to install it
- Continue the instructions and choose Finish to complete installing the app
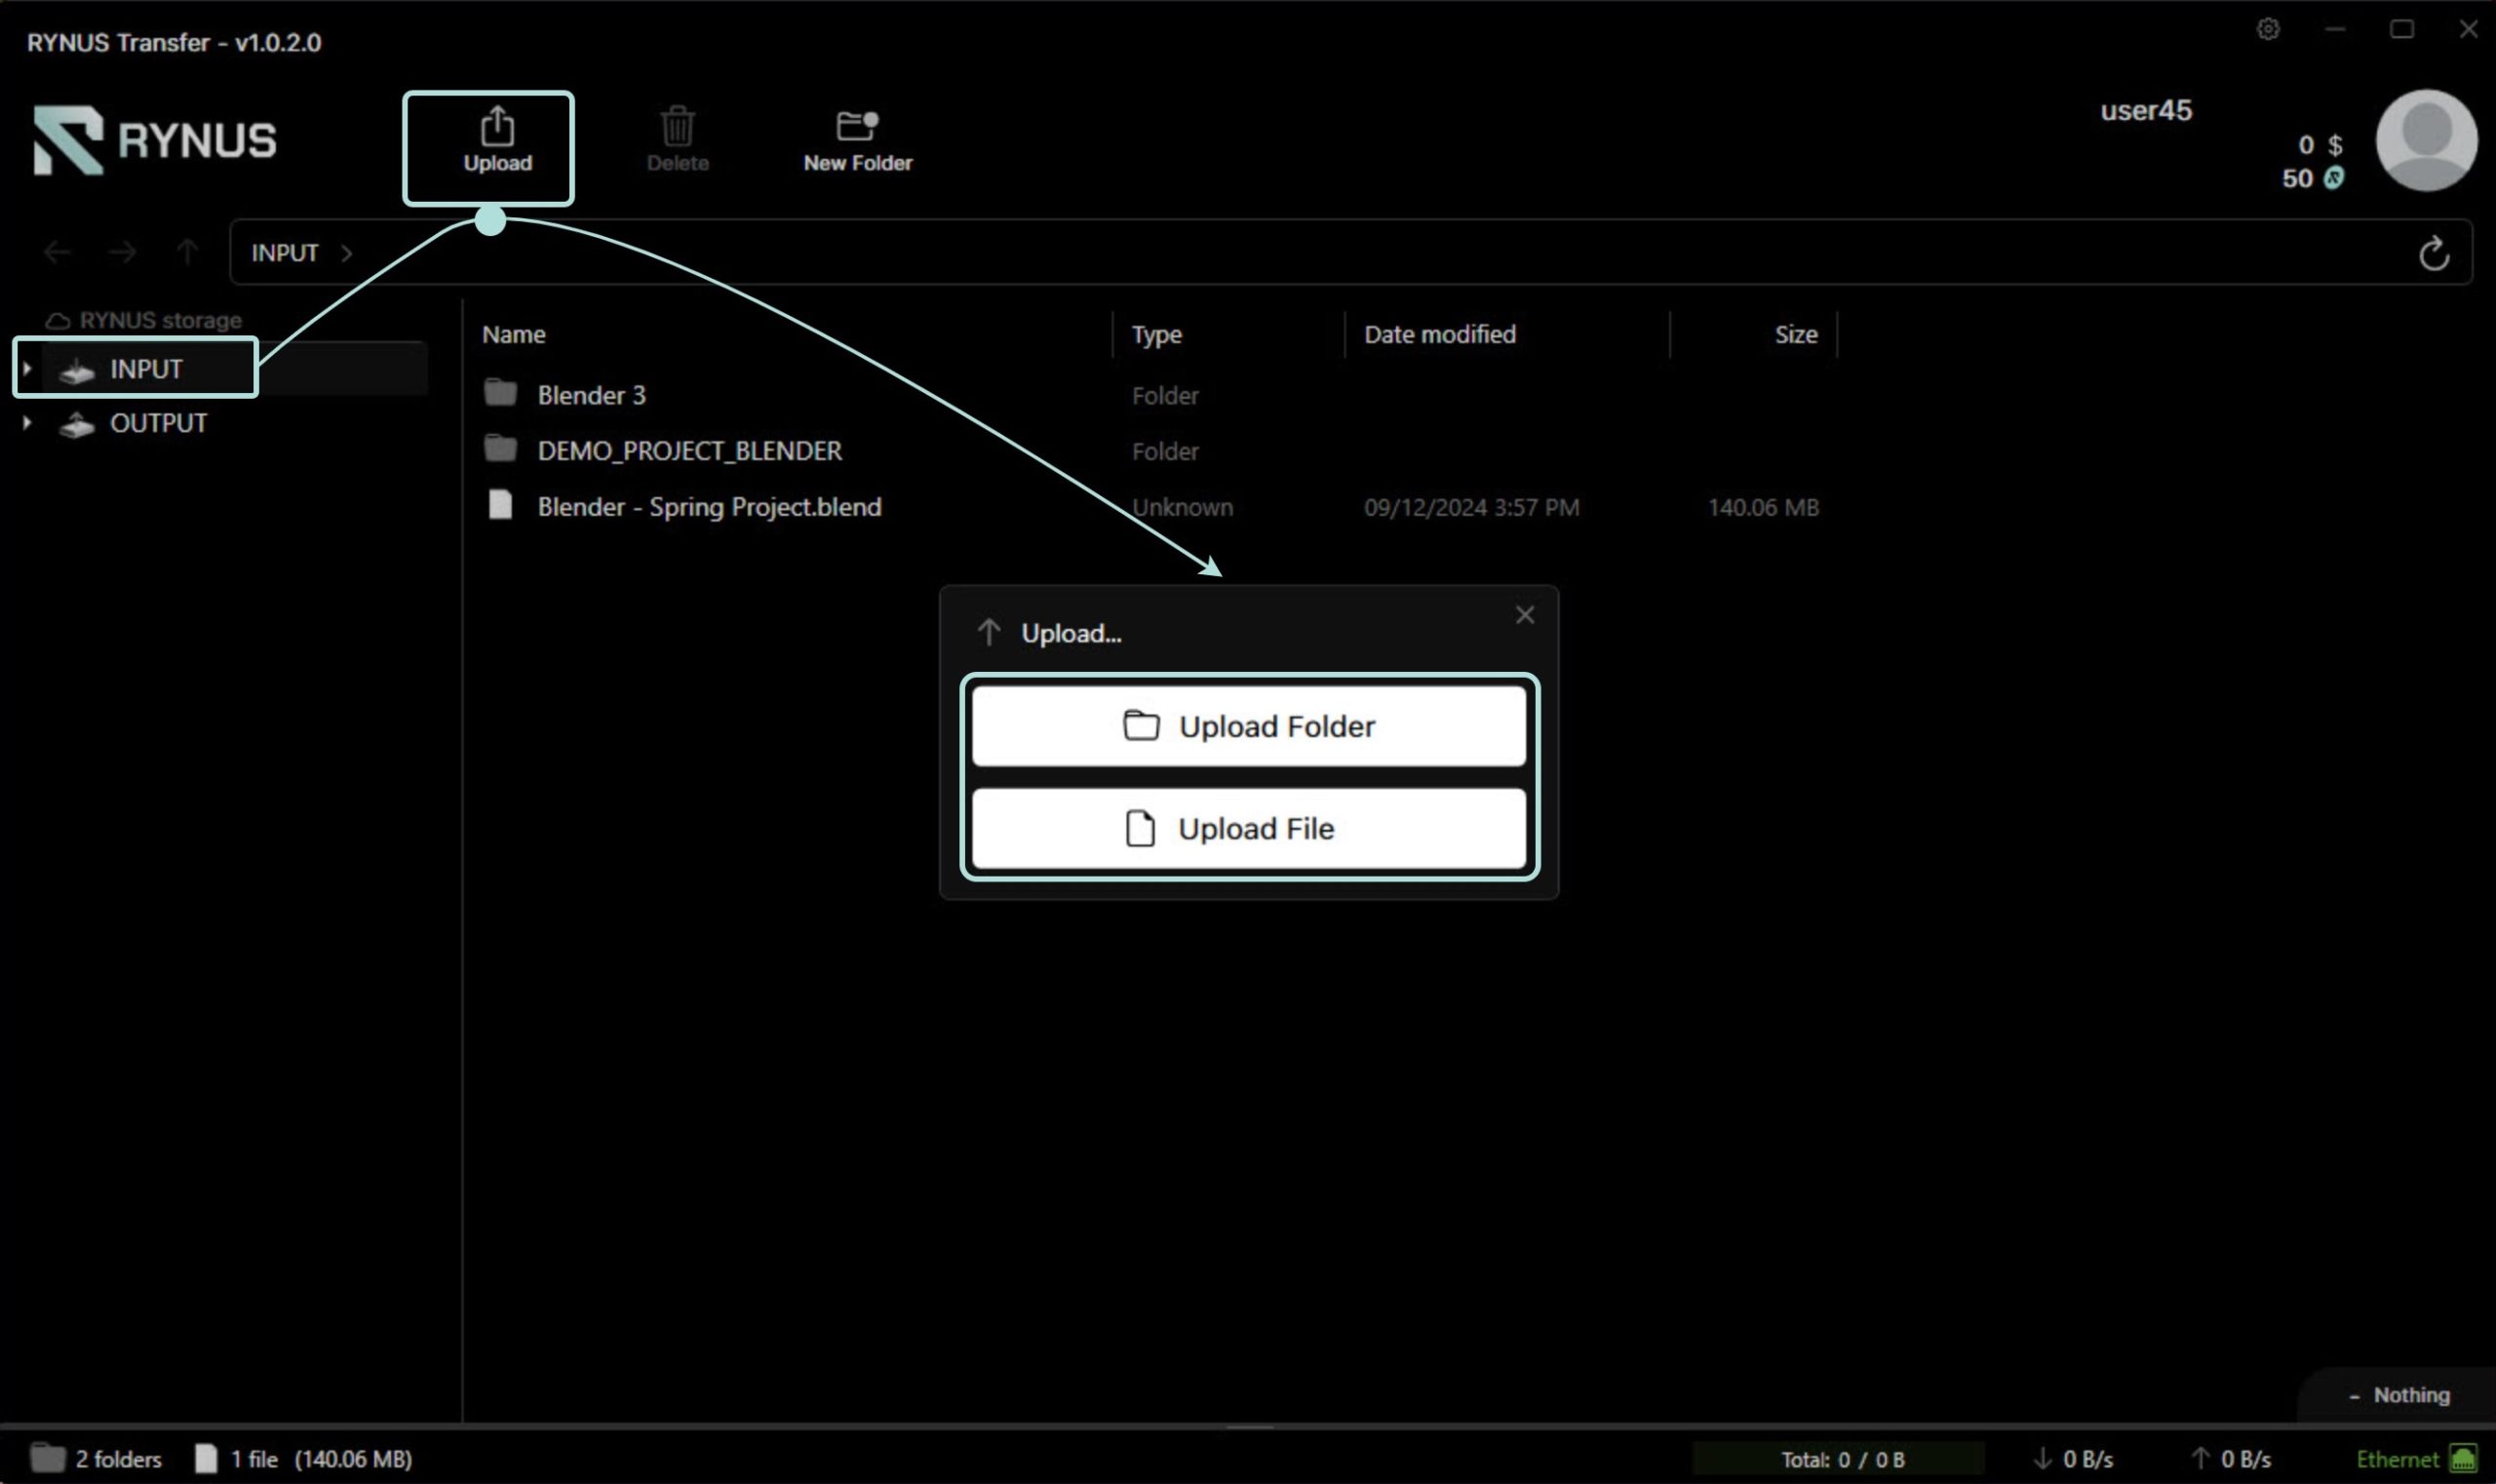
Upload Project Data
- Open the app and log into your Rynus account
- Navigate to the INPUT tab
- Select the Upload option
- Choose to upload your computing job data by selecting the appropriate Folder(s) or File(s)
Create Rendering Job
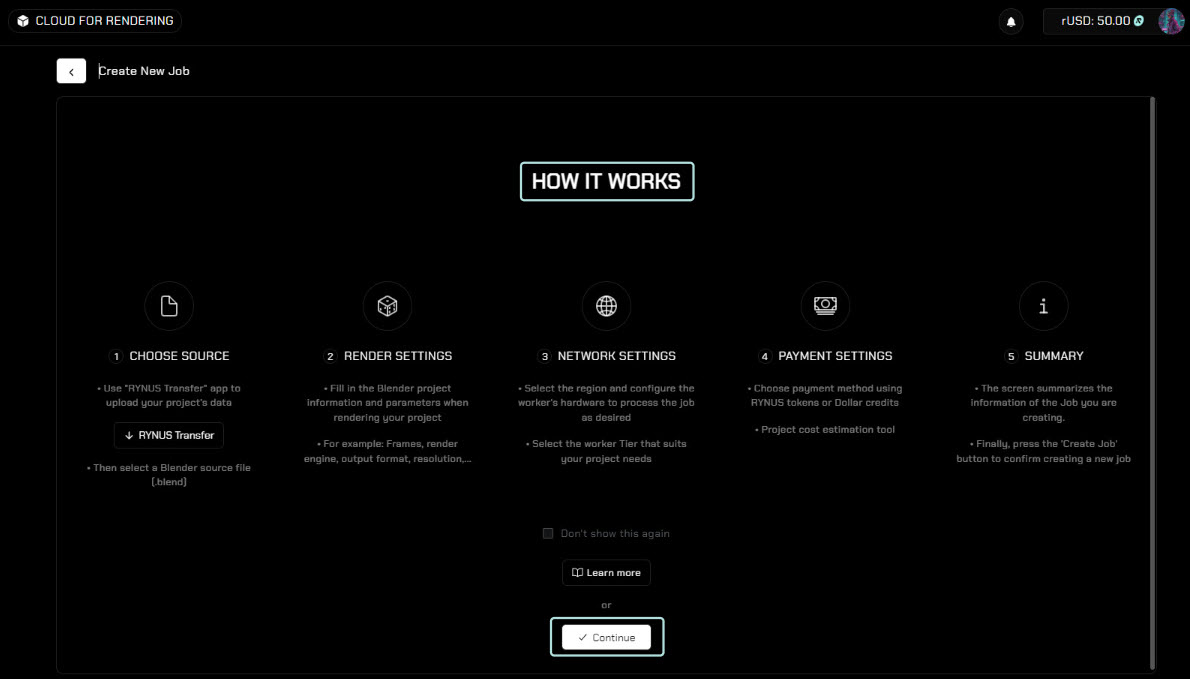
- Go back to the CLOUD FOR RENDER portal, and choose the New rendering job button

- A Create New Job page shows the How it Works guide with 5 simple steps, choose the Continue button
- Choose source: From the list of your uploaded job, choose a job file that you want to render

- Configure Render Settings
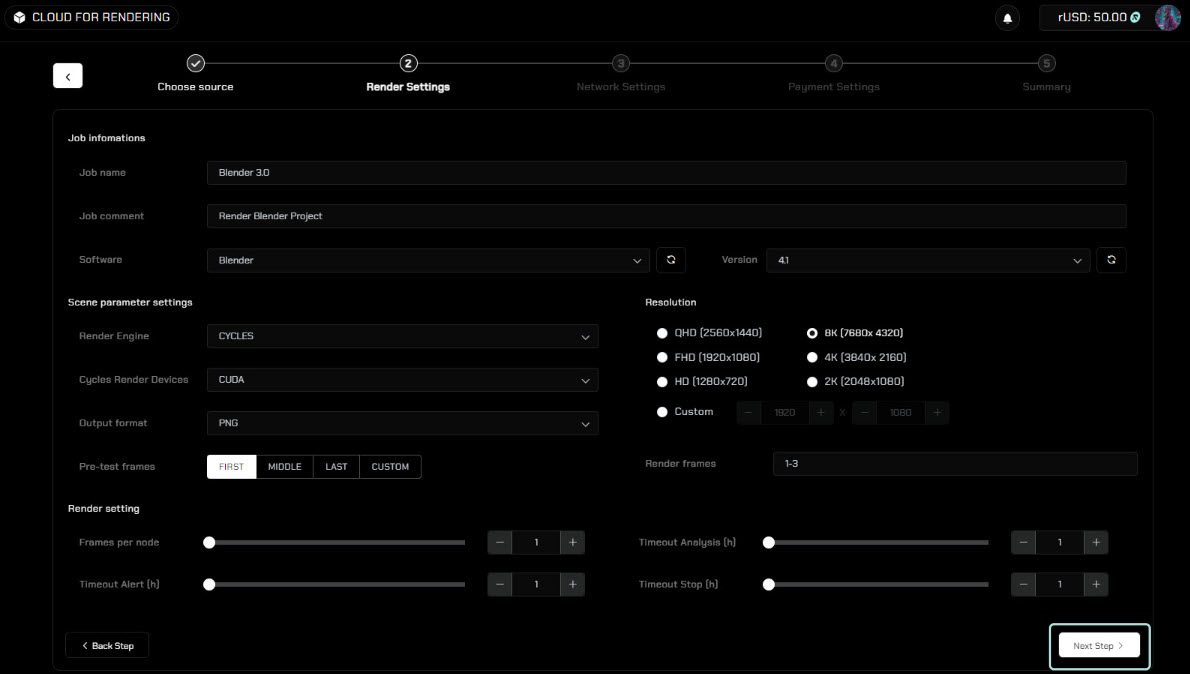
- Job information: Add a Job name and Job comment, and choose the Render Software and its Version
- Scene parameter settings: Select Render Engine, Render Device, Output format, Pre-test frame, Resolution, and Render frames
- Render setting: Configure Frame per node, Timeout Alert, Timeout Analysis, and Timeout Stop
- Configure Network Settings
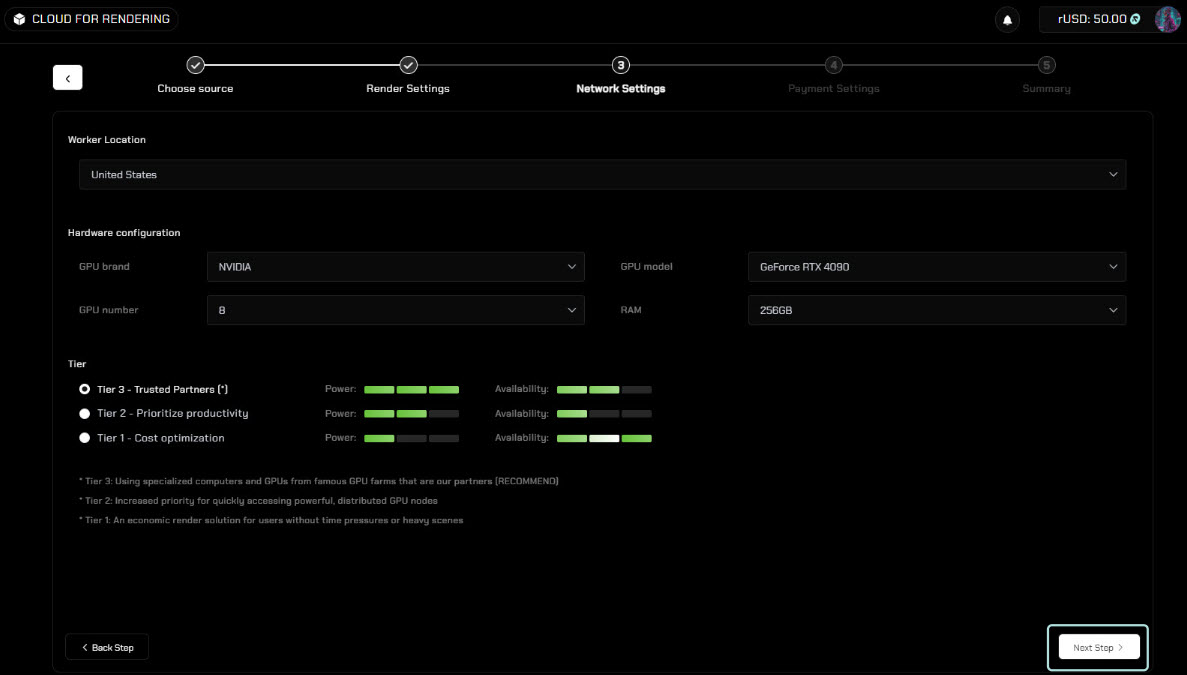
- Select the Worker Location
- Select the Hardware configuration: GPU manufacturer, GPU model, GPU number, and RAM
- Select the Pricing Tier: Tier 3 – Trusted Partners, Tier 2 – Prioritize productivity, Tier 1 – Cost optimization
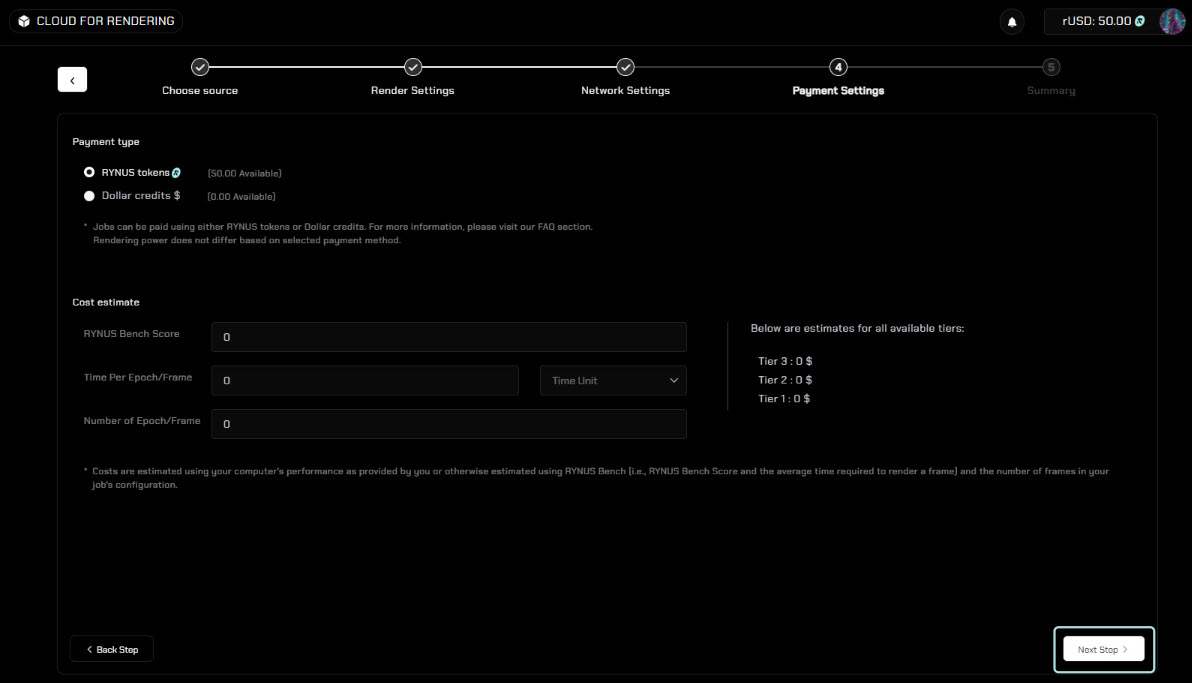
- Configure Payment Settings
Select either RYNUS tokens or Dollar credits to pay for the computing services.
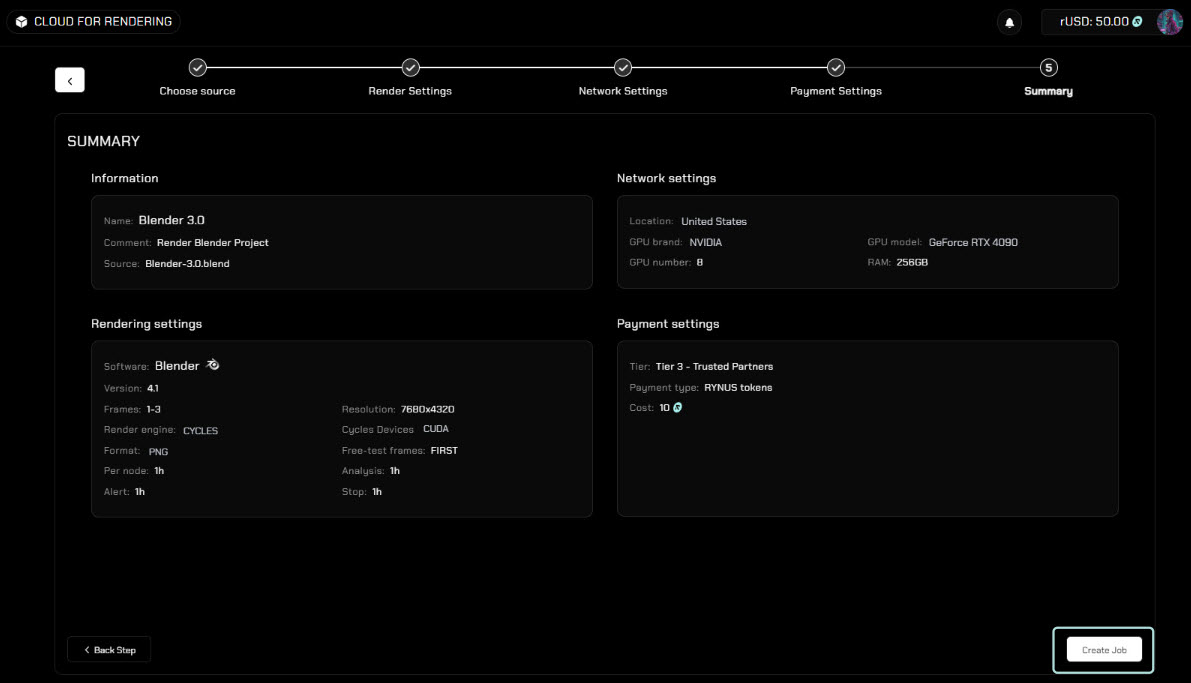
- Check the Summary page to confirm your job settings and configurations. Then, click the Create Job button to submit your job.
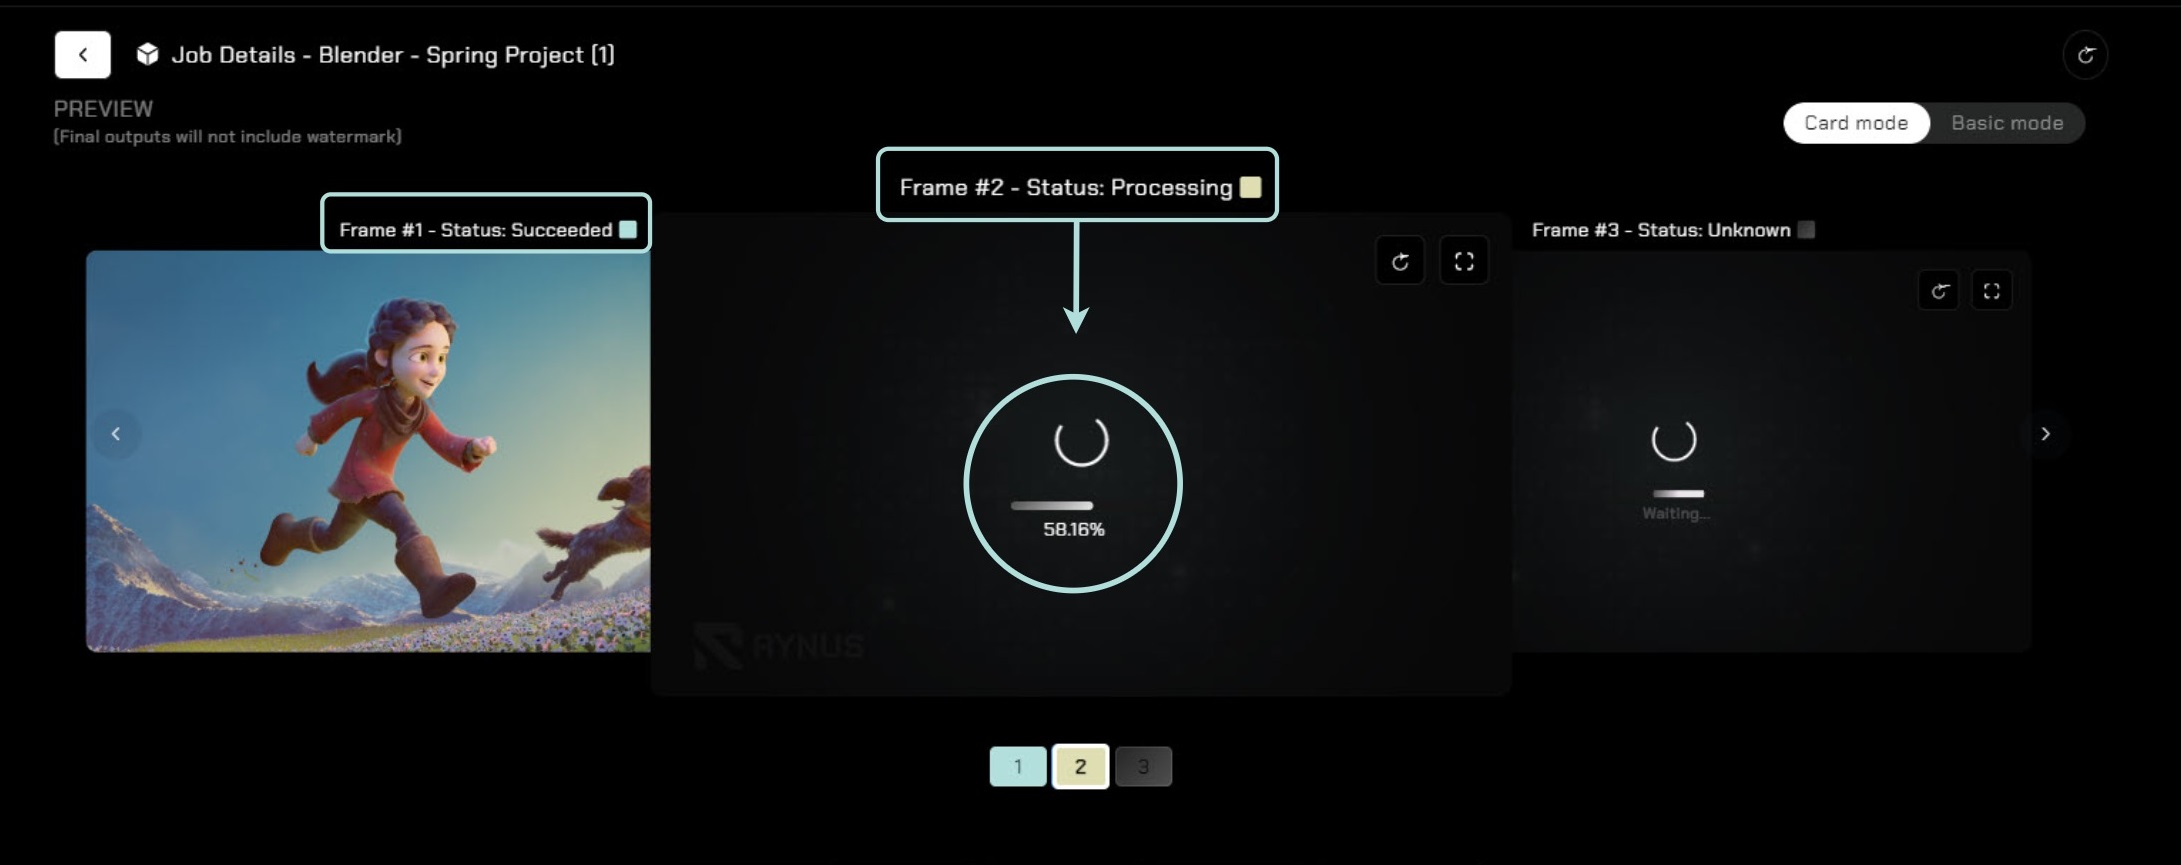
Monitor Rendering Progress and Review Results
Monitor Rendering Progress
You can track your rendering jobs in real-time, with a detailed breakdown of each frame status (enqueued, rendered, or completed).
Important: An essential part of the rendering process is the Rynus AI Core Verification. The Rynus’s AI Core system scans each frame to ensure it has been rendered correctly, which is important to create the Proof of Work. This step guarantees that the rendered results meet your requirements.
Review Results
While the majority of frames are rendered accurately (around 95%), there is a small chance (5%) of inaccuracies. To address this, Rynus Cloud offers a quality assurance feature, allowing you to review the rendered frames. You can confirm which frames are correct and request re-rendering of the incorrect frames, ensuring that all output meets your expectations.


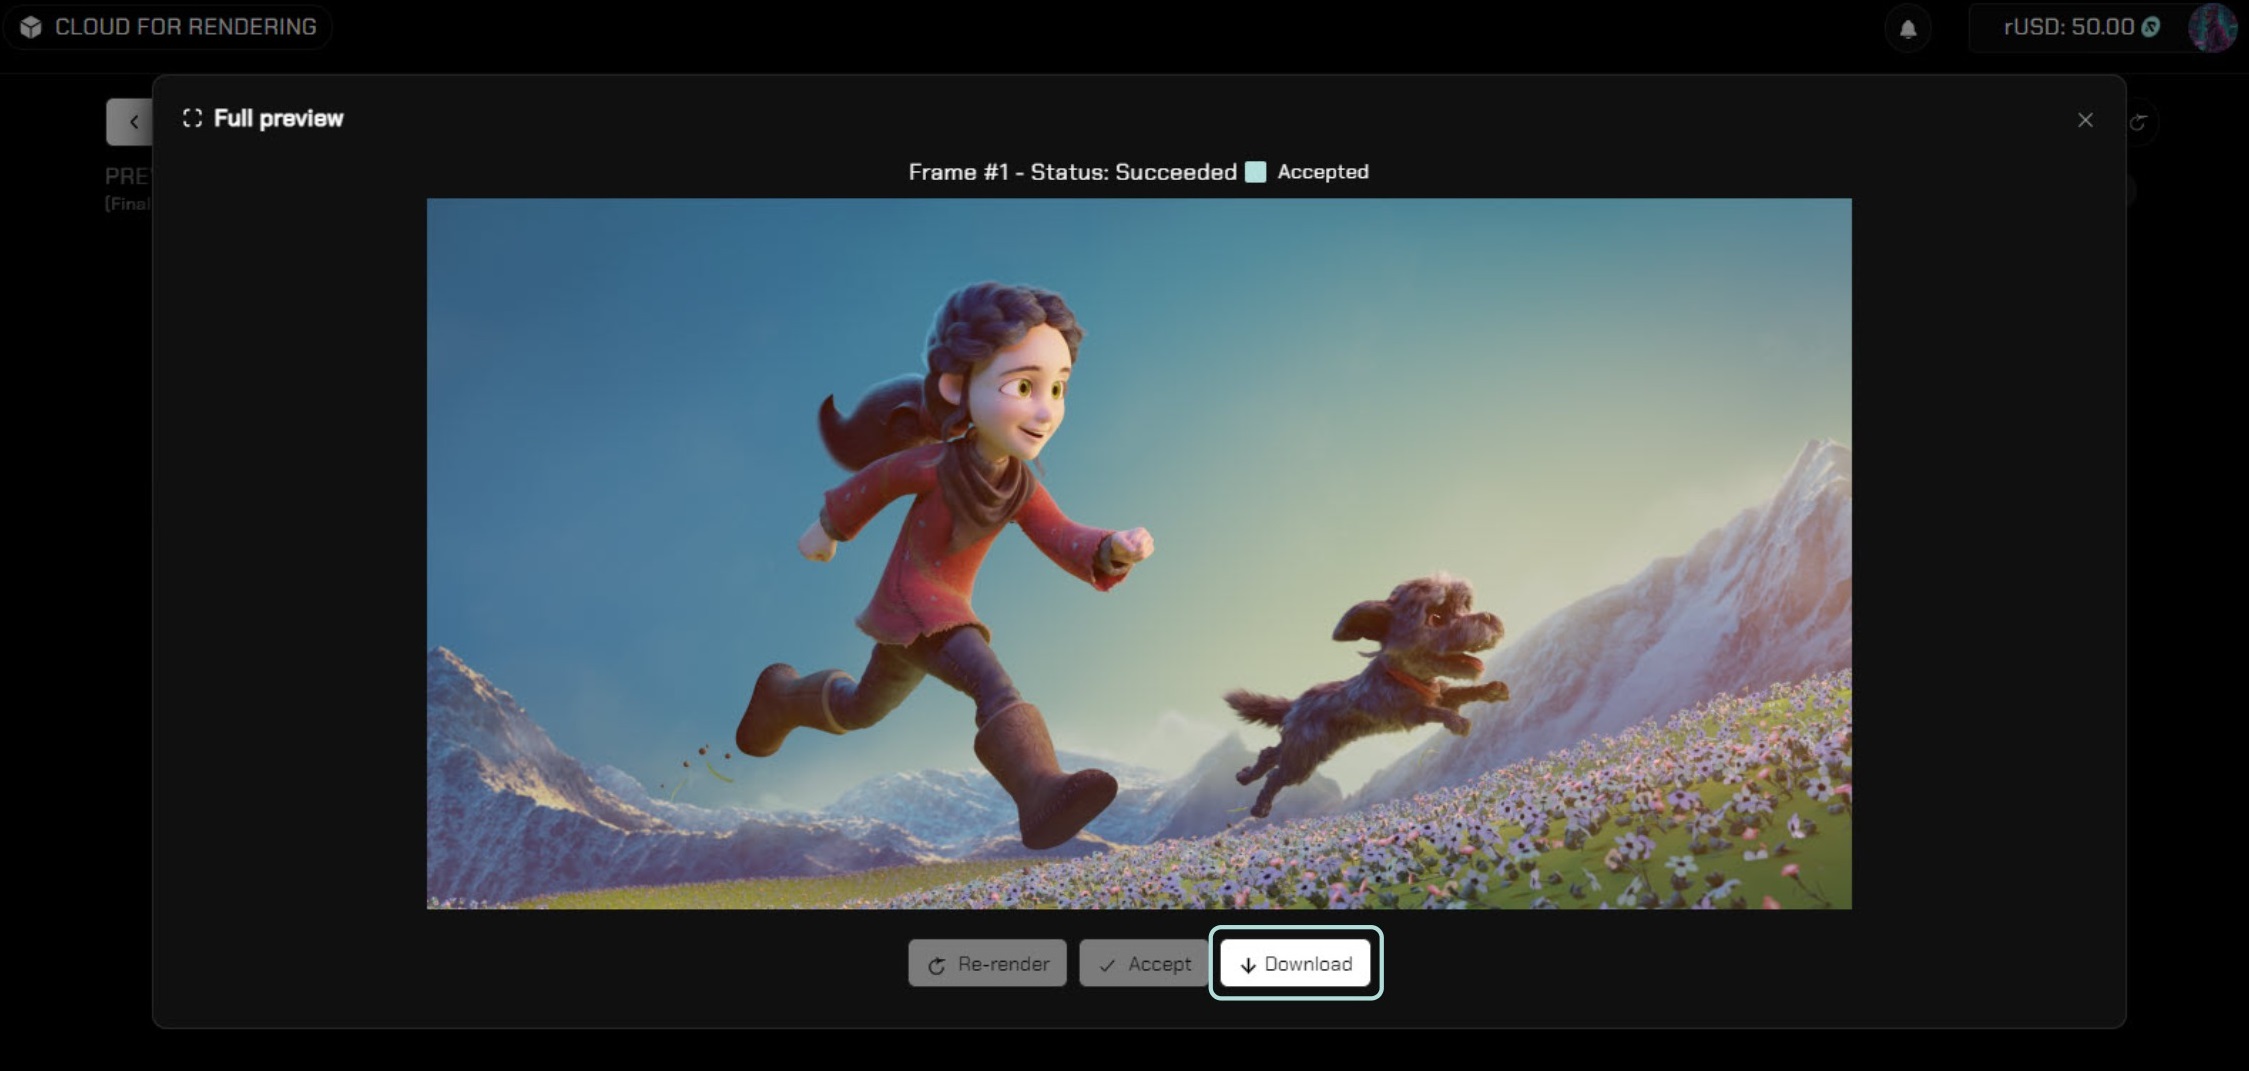
Download Results
After the rendering job is completed and you have accepted it, you can download the final results directly to your personal devices.
Download from Rynus Cloud
Download from Rynus Transfer App
- Navigate to the OUTPUT tab
- Select the job result Folder(s) or File(s) you want to download
- Download the selected results directly to your device